
Design variants and the BOM
A KiCad design can define several assembly variants, for example a Lite and
a Pro population of the same board. Prism lets you pick a variant and see
the schematic, board, 3D model and BOM as that variant is built.
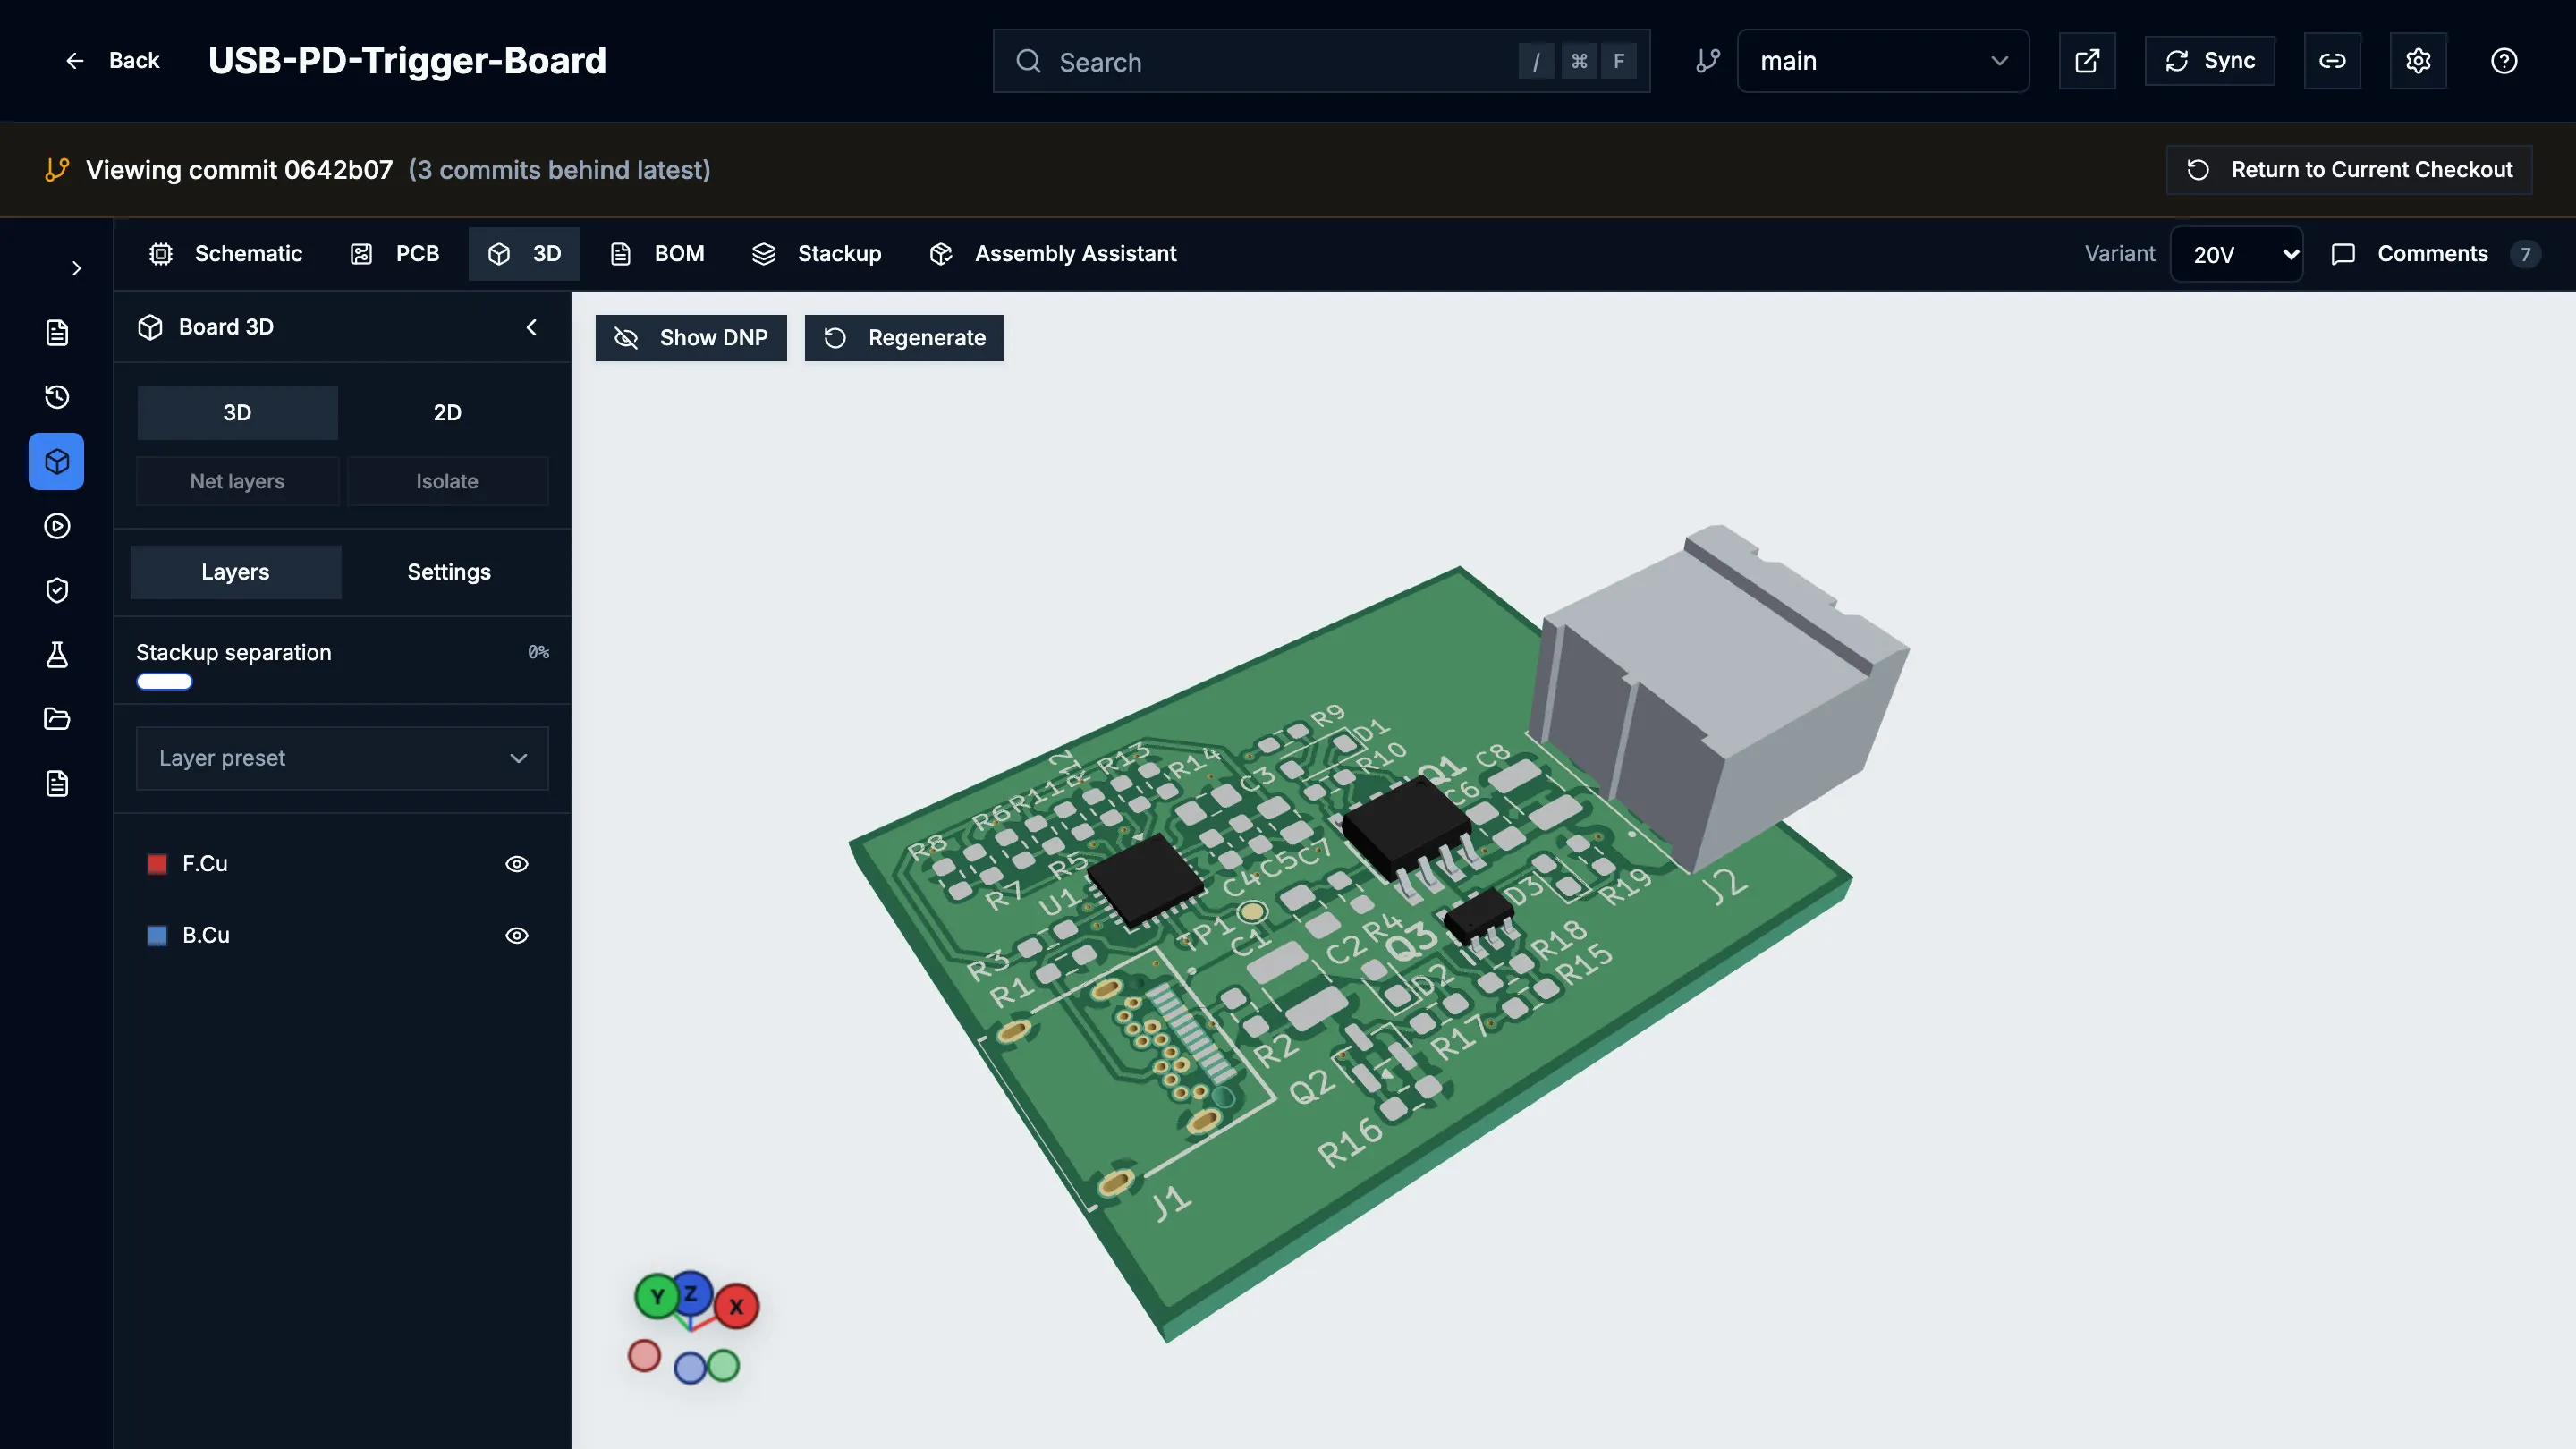
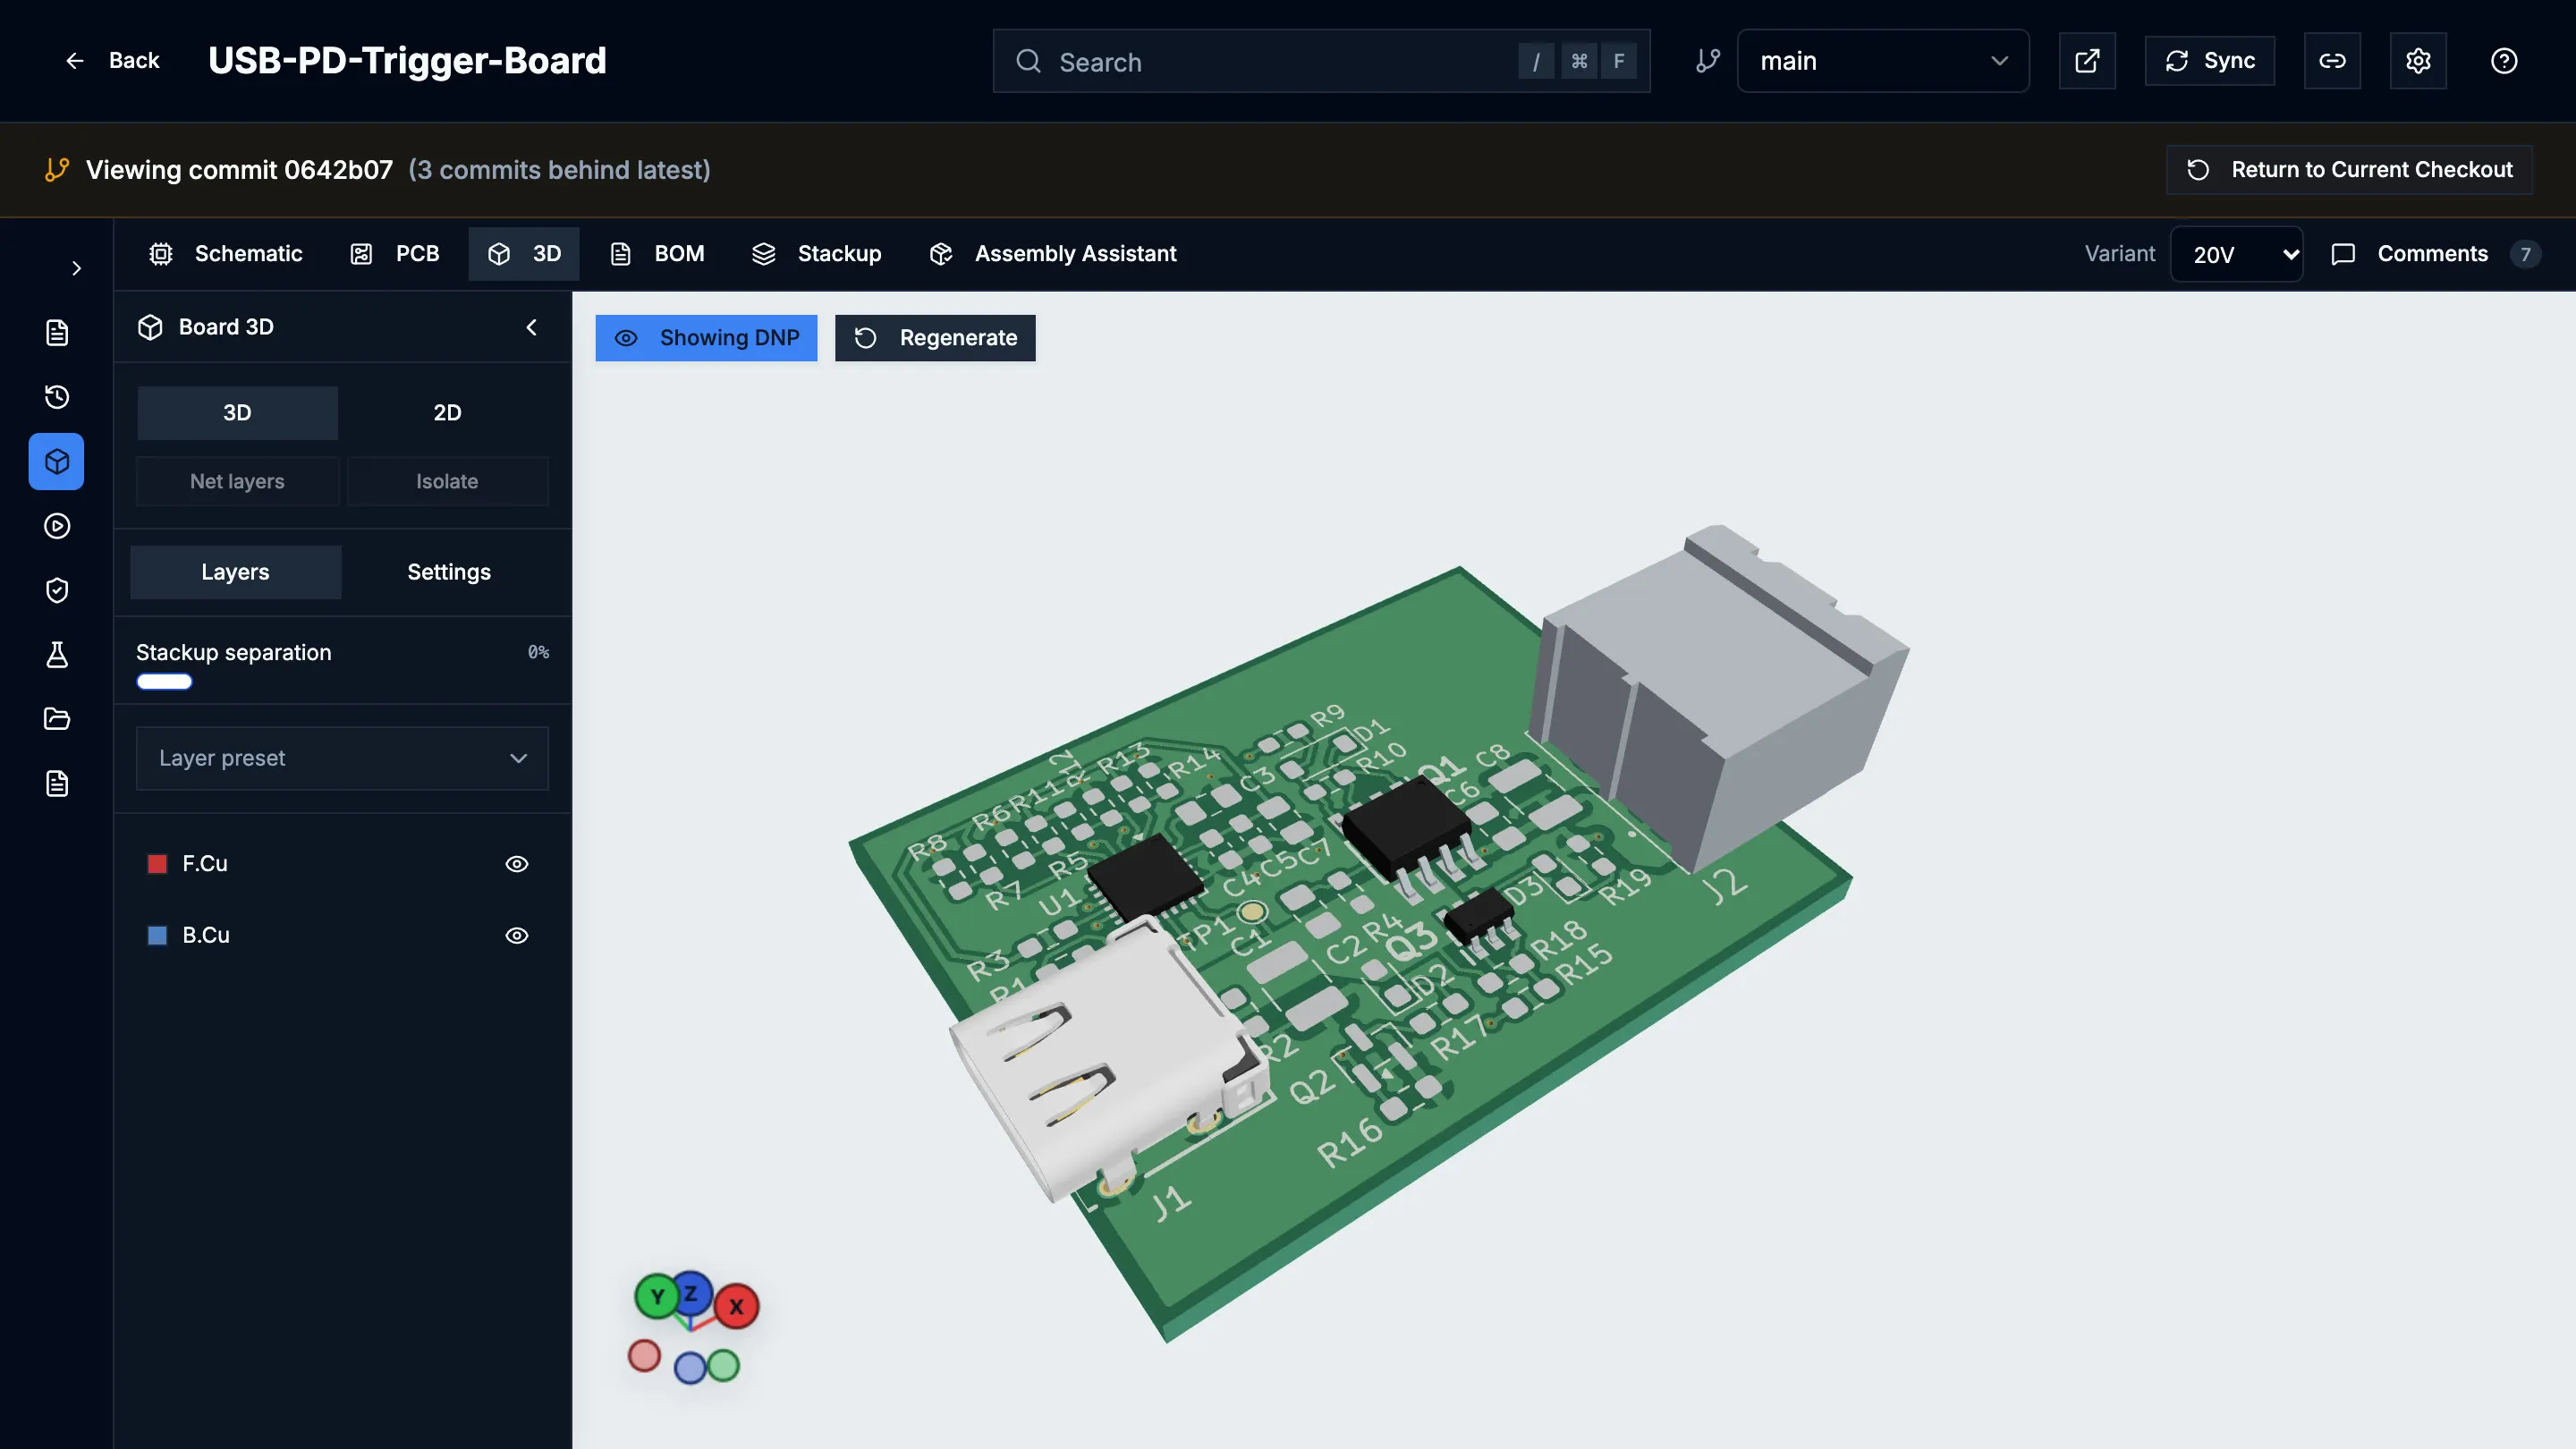
The screenshots on this page use USB-PD-Trigger-Board’s 20V variant, which
leaves out the USB Type-C connector, J1.
Choose a variant
Section titled “Choose a variant”When the revision you are viewing defines variants, the Visualizers toolbar shows a Variant menu.
- Open the project’s Visualizers.
- In Variant, pick a variant. Default is the base design.
The choice applies to the Schematic and PCB viewers, open insets, the 3D model, the BOM, the Selection panel and the design search.
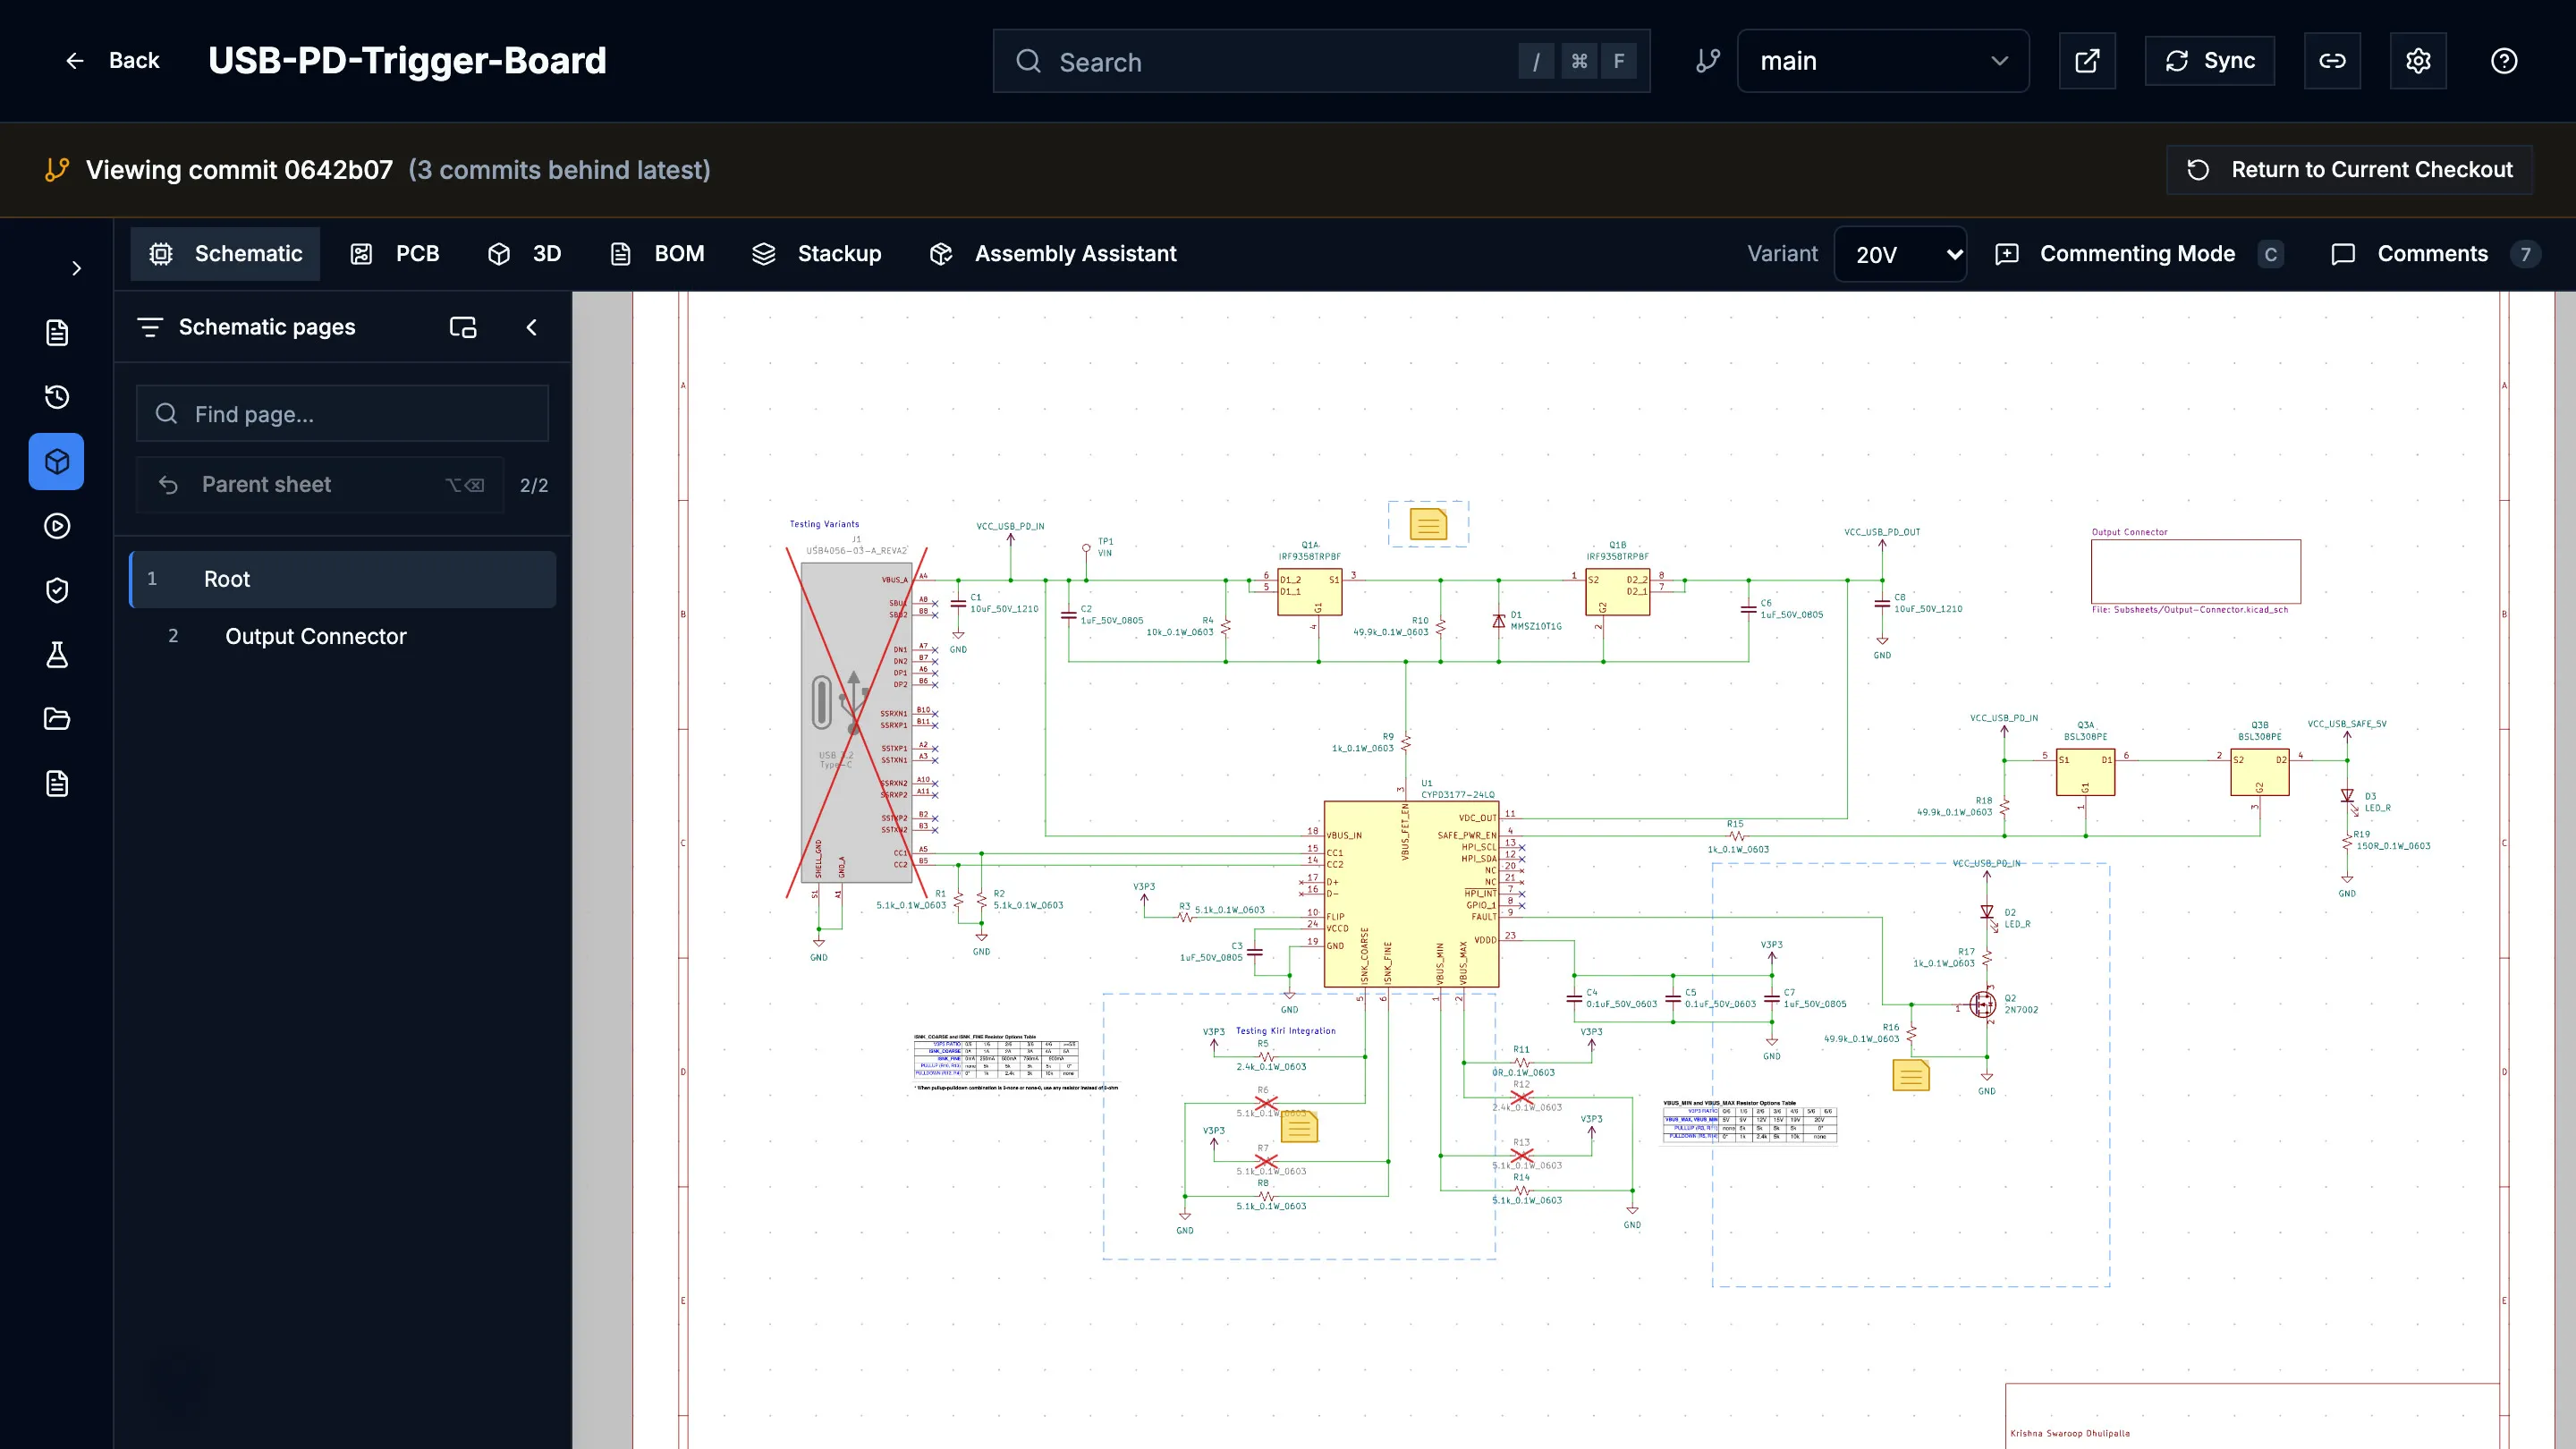
The variant is saved in the page URL as ?variant=<name>. A link you copy
opens the same variant, and reloading or going back keeps it.
If the revision has no variants, the menu does not appear. Other states show a note next to the menu:
- Variant “…” is not in this revision; showing the default assembly. The link names a variant this revision does not have. The link is left as it is, so it still works on a revision that has the variant.
- This revision has no variant data; showing the default assembly.
- Design variants could not be loaded. Select Retry.
See the parts that are not fitted
Section titled “See the parts that are not fitted”The 3D model hides parts that are marked do-not-populate (DNP) in the selected variant. Select Show DNP above the model to show them without changing the variant.
Some limits apply:
- DNP set on a KiCad rule area is not applied to the parts inside it. DNP set on a part or a sheet is applied.
- A part with alternate footprints stays visible in 3D with its DNP state unresolved. The 3D tab names how many such parts there are, for example 2 alternate-footprint parts stay visible.
- The Assembly Assistant tab is generated for the base design and does not follow the selected variant. It says so when a variant is selected.
Read the BOM
Section titled “Read the BOM”The BOM tab lists the parts of the revision, grouped into rows of identical parts, with a column per field. A column whose value differs between the parts in a row reads Mixed, for example DNP when the selected variant leaves out some of them.
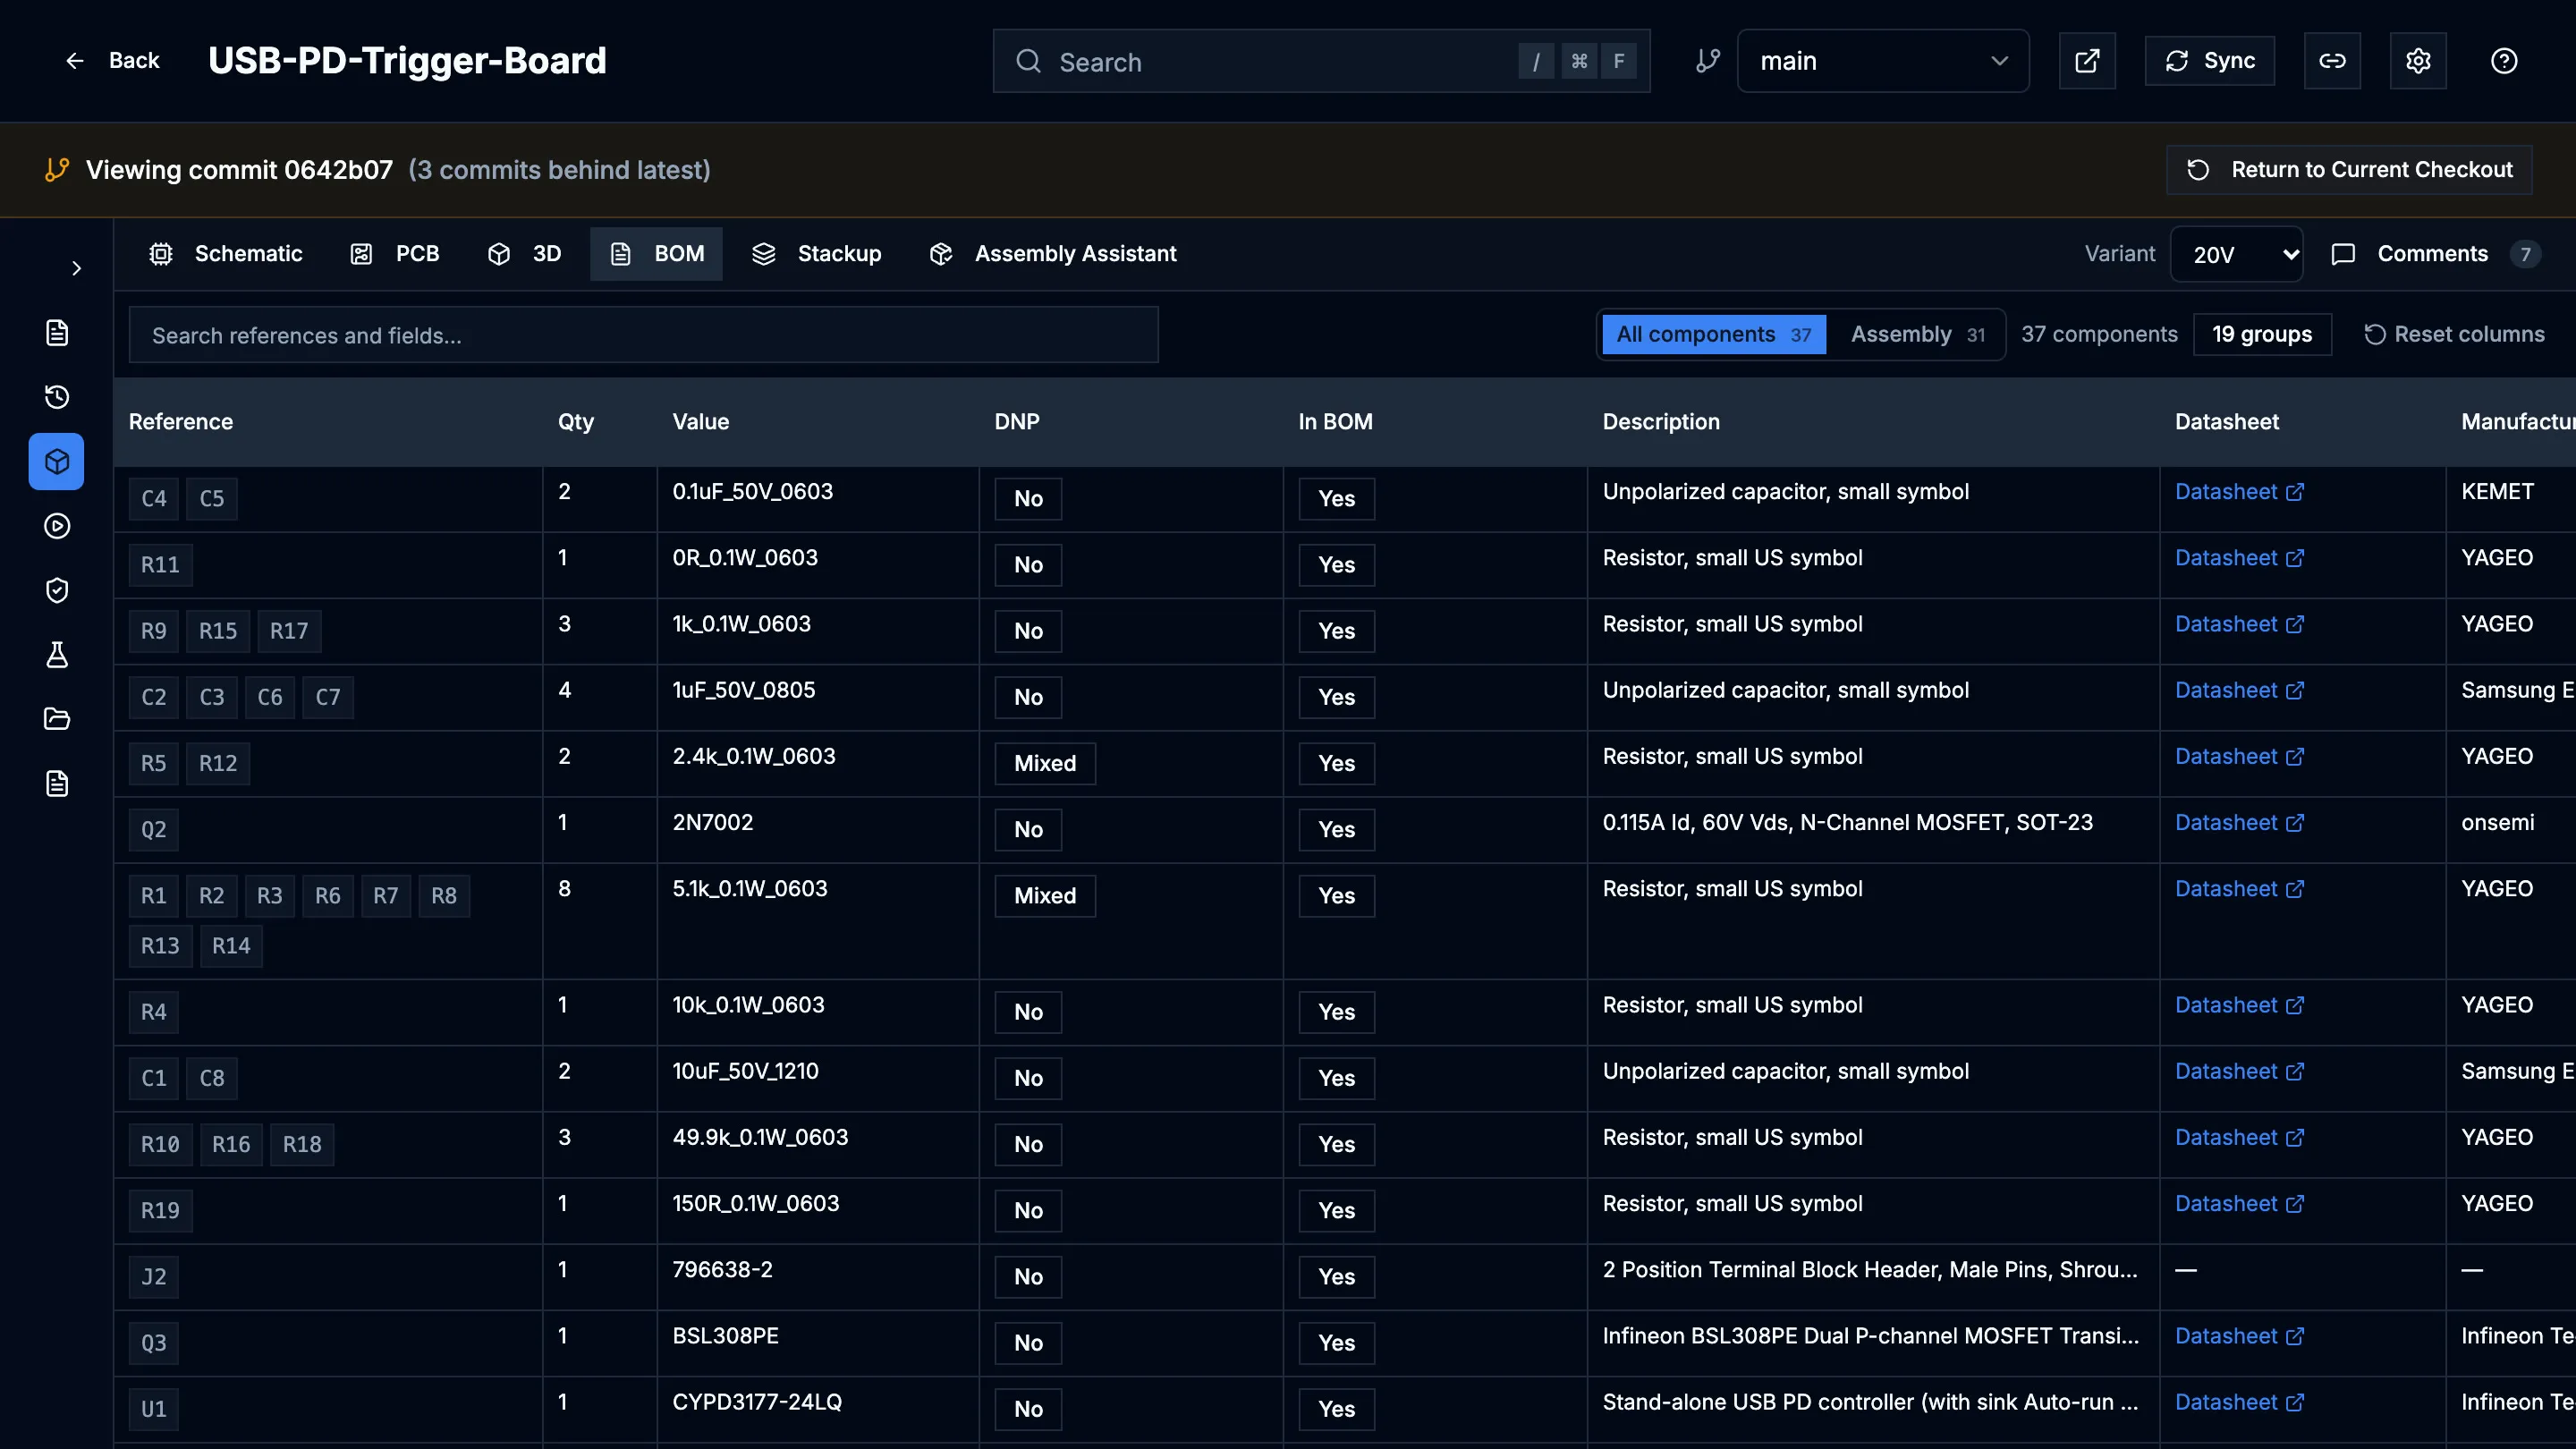
- Filter. Type in Search references and fields… to filter by
reference or any field. Prefixes match as you type; add a trailing space to
match a reference exactly. You can narrow to one field with
ref:,value:,mfr:,mpn:,vendor:orfootprint:, for examplevalue:10k. - Assembly filter. All components lists every part with its effective In BOM and DNP flags. Assembly keeps only the parts that are fitted: in the BOM and not DNP. The counts next to the filter show how many parts each choice includes.
- Cross-probe. Select a row to select its parts on the schematic and the board.
- Columns. Drag a column edge to resize it; Reset columns restores the widths.
The BOM never drops a part: a part that is excluded or not fitted in the selected variant stays in All components with its flags.
If the revision’s part data is not ready, the tab shows BOM metadata is not available; see Design data.
Variants in a release
Section titled “Variants in a release”Release Studio offers the same variants when you start a release, with Default first. The variant you pick is recorded as part of the release. See Release Studio.
Compare BOMs between revisions
Section titled “Compare BOMs between revisions”To see how the BOM changed between two commits, use the BOM tab of Design Comparison.